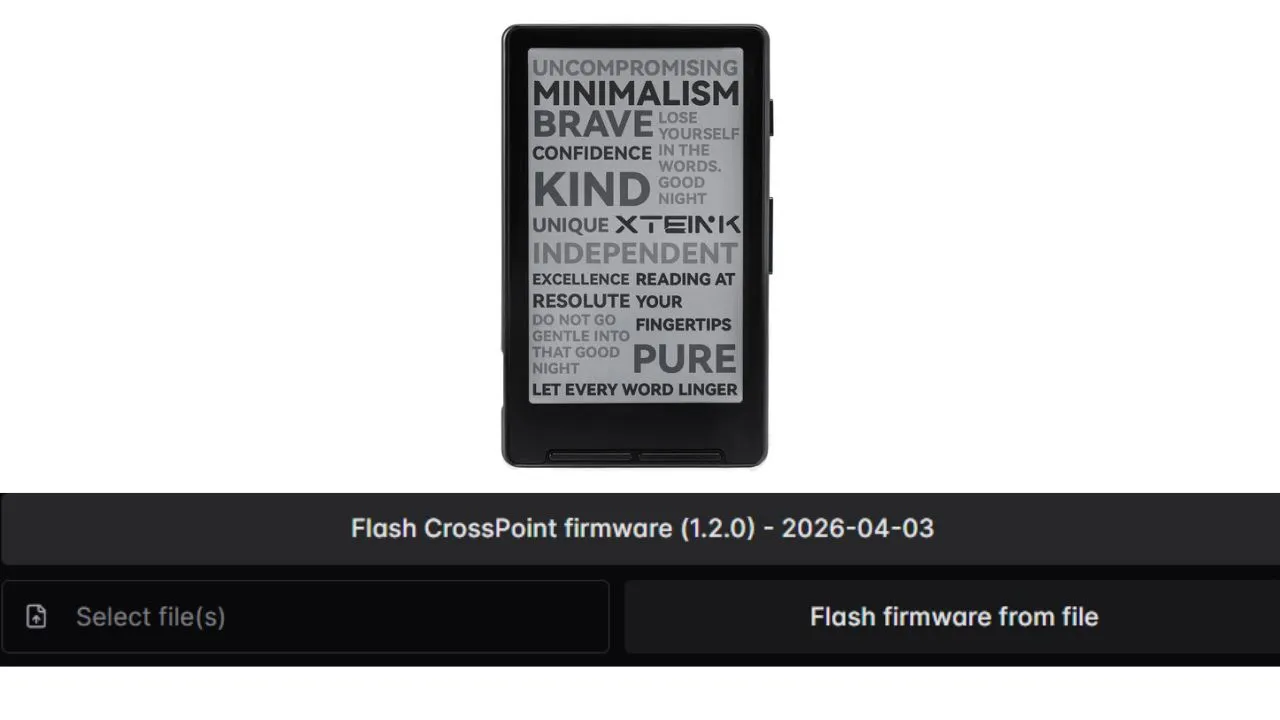
How to Install CrossPoint Firmware on XTEINK X4 e-Reader
The XTEINK X4 is a genuinely affordable e-paper reader. But the moment you power it on for the first time, you hit a wall, the interface feels bare, and your options for customization are almost nonexistent. That frustration is exactly what pushed the open-source community to build CrossPoint Reader.
This guide walks you through the entire process, from backing up your original firmware to rebooting into CrossPoint for the first time. You do not need prior technical experience. By the end, you will have a fully working CrossPoint installation on your XTEINK X4.
What Is CrossPoint Firmware and Why Install It?
CrossPoint Reader is a free, community-built firmware for the XTEINK X4. It replaces the locked-down stock software with a full-featured reading environment, complete with WiFi uploads, custom fonts, configurable layouts, and proper EPUB support. Hundreds of contributors have shaped it into the go-to firmware choice for anyone who wants to get real use out of this device.
CrossPoint Reader vs. Stock XTEINK Firmware
The stock XTEINK firmware ships in Chinese/English and offers minimal configuration options. You get a basic file browser, limited font control, and no wireless transfer. For casual use, it might get by. For anyone who reads regularly, it falls short fast.
CrossPoint changes all of that. Here is what you gain after installing it:
- Full EPUB 2 and EPUB 3 support with image rendering
- WiFi book uploads and over-the-air firmware updates
- Configurable fonts, layouts, and display settings
- KOReader Sync for cross-device reading progress
- Battery charging indicator and crash diagnostics
- Multi-language support covering 20-plus languages
The latest release, CrossPoint v1.2.0, also adds proper kerning, footnote navigation, an integrated EPUB optimizer, and WebDAV support. That is a meaningful step up from what the stock firmware offers.
Is CrossPoint Firmware Safe to Install?
CrossPoint is fully open-source and hosted publicly on GitHub. You can read every line of code before you flash anything. The project is not affiliated with XTEINK, but it has a large and active contributor base.
The flashing tool at xteink.dve.al also offers a full backup before you make any changes. If something goes wrong, you can restore your device to its original state. The risk of anything going permanently wrong is extremely low, but the backup step exists for good reason, and you should use it.
Before You Begin — Prerequisites and Requirements
Hardware Requirements
You need three things before you start:
- Your XTEINK X4 e-reader, charged to at least 50%
- A USB-C cable that supports data transfer, not just charging
- A computer with a compatible browser (details below)
The USB-C cable point matters more than it sounds. Many budget cables are charge-only, and they will not establish a serial connection. If your device does not show up during the flash process, a bad cable is the first thing to check.
Software and Browser Requirements
The web flashing tool uses the WebSerial API, which only works in Chromium-based browsers. That means Google Chrome or Microsoft Edge. Firefox and Safari do not support WebSerial and will not work. You will also need a stable internet connection. The tool downloads the firmware files directly from the web as it writes them to your device.
You do not need to download any software. The entire flash process runs in the browser at https://xteink.dve.al. Keep that tab open and stable throughout the process..
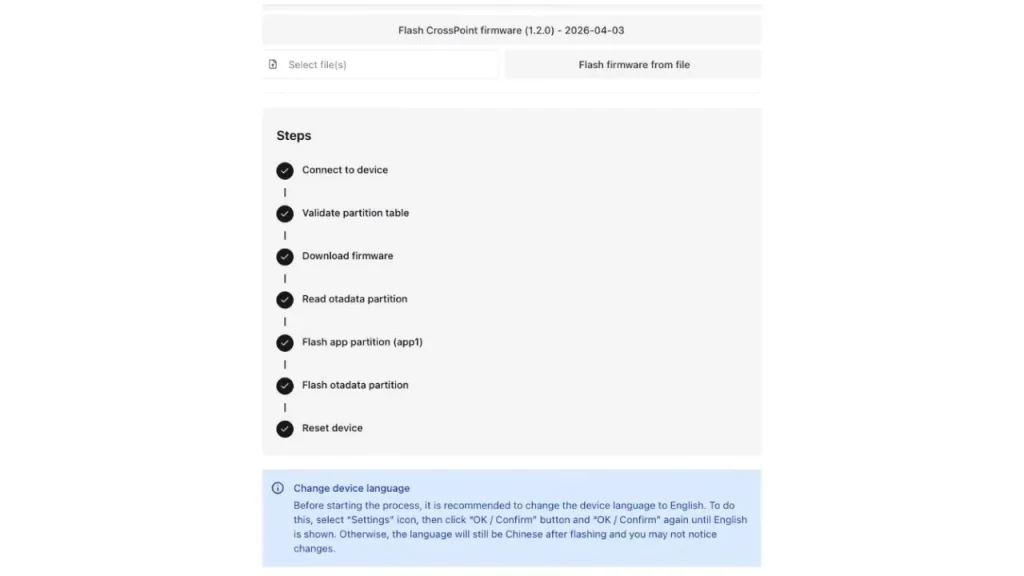
Note: Before you flash, change the device language to English in the stock firmware settings. This prevents the language from reverting to Chinese after the flash. Go to Settings, then confirm through the menu until English appears.
Wake Your Device Before Connecting
Your XTEINK X4 must be awake, not in sleep mode, when you plug it in. A sleeping device will not register as a serial connection in the browser. Press the power button briefly to wake it, then connect the cable.
This is one of the most common reasons people run into trouble during installation. Wake the device first, then connect.
Step-by-Step: How to Install CrossPoint Firmware on XTEINK X4 e-Reader
Step 1 — Connect Your Device
Press the power button on your XTEINK X4 to make sure it is fully awake. Then plug the USB-C end into your device and the other end into your computer. Do not let the screen time out and sleep during this step.
Step 2 — Open the Web Flash Tool
Open Google Chrome or Microsoft Edge, then go to https://xteink.dve.al. You will see options for official English and Chinese firmware, as well as the CrossPoint option. Ignore the official firmware options for now.
Click the “Flash CrossPoint Firmware” button. The site always links to the latest stable release, so you get the current version automatically.
Step 3 — Select and Connect Your Device
A browser pop-up window appears with a list of available serial devices. Your XTEINK X4 should appear here. Select it and click “Connect.”
If nothing appears in the list, your USB-C cable is likely charge-only, your device has gone to sleep, or you are not using a Chromium-based browser. Check all three before trying again.
Step 4 — Flash the Firmware
Once connected, the tool takes over. You will see it validate the partition table, download the firmware, and write it to the device. Progress appears directly on screen.
Do not disconnect your device or close the browser tab while this runs. The process typically finishes in one to two minutes. Do not treat a slower connection as a failure; it can take up to 5 minutes, depending on their internet speed.
Step 5 — Reboot into CrossPoint
Once flashing finishes, you need to restart the device manually. This part requires a specific physical sequence:
- Unplug the USB cable from the device.
- Locate the small “Reset” button near the bottom right of the reader.
- Press and release the reset button.
- Immediately press and hold the main power button for about three seconds.
Your screen will flicker and then show the CrossPoint booting logo. You have now successfully changed your firmware.
How to Back Up And Restore Your Original Firmware
Never skip the backup step. Your original firmware contains specific data for your hardware. A backup lets you fix the device if the power goes out or the cable slips.
Why Backing Up Is Worth Your Time
The XTEINK X4 uses an ESP32-C3 chipset. This chip stores information in a way that can be lost if you overwrite the wrong part. A full backup creates a 16 MB .BIN file on your computer. This file is a perfect copy of your device’s current state.
Step-by-Step Backup Using the Web Flash Tool
The easiest way to back up is through the same website you use for flashing. Here is the process:
- Connect your awake XTEINK X4 to your computer via USB-C.
- Open Chrome or Edge and go to xteink.dve.al.
- Look for the “Full flash controls” section.
- Click the button that says “Save full flash.”
- Select your XTEINK X4 from the browser pop-up.
- Wait for the process to finish.
This step takes time. It usually lasts about 25 minutes. Do not close the browser tab or unplug the cable until it finishes. Once it ends, your browser will download a file named flash.bin. Store this file somewhere safe, such as a cloud drive or a dedicated folder.
How to Restore the Backup Later
If you want to go back to the stock software, you have two options, depending on how much you want to restore.
Full restore: Use the “Write full flash from file” option on the same website. Select your flash.bin file, and the tool writes it back to the device. This restores everything to exactly how it was before you started.
Quick revert without a full reflash: If you have already installed CrossPoint and simply want to switch back to your original firmware, go to xteink.dve.al/debug and use the “Swap boot partition” button. CrossPoint writes to a second partition and leaves your original firmware intact, so this shortcut lets you toggle between the two without rewriting anything. It is the fastest way to revert, and you might prefer it.
Troubleshooting Common Installation Issues
Device Not Detected in Browser
If your XTEINK X4 does not appear in the serial device list, check three things in order. First, replace the USB-C cable with a data-capable one. Second, wake your device before plugging in. Third, confirm you are using Chrome or Edge, not Firefox or Safari.
A charge-only cable is the most frequent culprit here. These cables look identical to data cables, so do not assume yours supports data transfer without testing it.
Flash Process Freezes or Fails
If the process stalls or errors out mid-flash, disconnect the device, wake it again, and retry from the beginning. Do not close the browser tab mid-flash. A strong, stable internet connection also helps, since the tool downloads firmware during the process.
Running the flash again from scratch after a failure is generally safe. The tool writes to a backup partition, so your original firmware remains intact unless you run a full flash write.
Device Won’t Boot After Flashing
A device that will not boot after flashing is rare, but it happens. If you saved a full flash backup earlier, connect your device via USB-C, go to https://xteink.dve.al, and use the “Write full flash from file” option to restore your flash.bin backup. This returns the device to its previous state, which is exactly why the backup step exists.
Device Reboots into Stock Firmware Instead of CrossPoint
If you complete the reboot sequence and your device starts up in the original stock firmware instead of CrossPoint, the boot partition did not switch as expected. This does not mean the flash failed. It means the device is still pointing to the original partition.
Go to https://xteink.dve.al/debug in Chrome or Edge while the device is connected. Use the “Swap boot partition” button. This tells the device to boot from the CrossPoint partition instead. Disconnect the cable, then repeat the reset-and-hold-power sequence from Step 5. Your device should now boot directly into CrossPoint.
If it still defaults to stock after swapping partitions, run the full CrossPoint flash again from https://xteink.dve.al. A second flash pass resolves this in almost every reported case.
CrossPoint Firmware Tips, Tricks, and Advanced Features
Adding Custom Fonts
CrossPoint supports custom font loading. Copy .TTF or .OTF font files to your device via USB-C or WiFi after installation. The firmware automatically detects them and adds them to your font selection menu. This is one of the most popular features among users who care about reading quality.
Transferring Books via WiFi
CrossPoint includes a built-in WiFi transfer interface that lets you send books to your device without touching a cable. Connect your XTEINK X4 to your local WiFi network via the Settings menu, then find the IP address displayed on the screen. Type that address into any browser on your computer or phone, and you get a simple web interface where you can drag and drop EPUB files directly onto the device. This works from any device on the same network and requires no additional software or accounts.
Using the EPUB Optimizer
CrossPoint v1.2.0 includes a built-in EPUB optimizer. You can access it directly on the device to clean up and reprocess books with compatibility issues. If a book shows formatting problems, run it through the optimizer before reaching for outside tools.
Staying Updated
CrossPoint updates through the same web flash process. Visit the CrossPoint Reader GitHub repository at github.com/crosspoint-reader/crosspoint-reader to check for new releases. When a new version drops, connect your device, go to https://xteink.dve.al , and flash again. The tool always links to the latest version.
OTA (over-the-air) updates are also available once CrossPoint is installed. Connect your device to WiFi and check the update option in the settings menu. This lets you skip the cable entirely for routine updates.
Recommended Reading
Benefits of KOReader: 13 Reasons It Beats Default Apps
CrossPoint and KOReader share the same philosophy, replacing locked-down stock software with open, reader-first experiences. If you enjoyed unlocking your XTEINK X4’s potential, this breakdown of KOReader’s standout features will show you exactly what community-built firmware can achieve across other e-ink devices.
How to Install Custom Fonts on Kindle (Easy Guide)
Custom font support is one of CrossPoint’s most praised features. If you want to go deeper on typography choices and how font installation works across different e-reader ecosystems, this practical guide walks through the full process and helps you identify which fonts genuinely improve long-reading comfort.